|
Topic: Sales > Working with Sales Orders > Pick-Pack-Ship Process For very small businesses that may not have a separate warehouse operation it may be possible to simply use the Sales Order document as a mechanism for picking and packing the orders. Moreover you can also use the original Sales Order as a Delivery Note/Packing Slip.
For larger businesses, typically with one or more warehouse operations, this mechanism is usually too simplistic. For this reason a distinct Shipment document is used to control the Pick, Pack and Ship work-flow.
For more information about how the Shipment document is used in the context of the Order Processing Work-flow please see Pick-Pack-Ship Process
Shipment documents can be create in two ways. Either from a Sales Order document or in bulk from the Sales Order List. For information about the latter please see Pick-Pack-Ship Process.
Enable Pick-Pack-Ship Before you can use Shipments or the Pick-Pack-Ship functionality you must enable it in your system. To do this go to Setup->Configuration->Shipments. Then make sure the Enable Pick-Pack-Ship checkbox is checked.
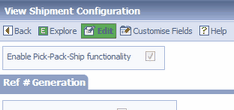 Enable Pick-Pack-Ship functionality.
Creating a Shipment from a Sales Order You can create a Shipment document from a Sales Order either for the whole document, or for particular Line Items. You would create a Shipment for specific lines if, for example, you wanted to Pick, Pack and Ship part of the document. In the following example we will create the Shipment for the whole Sales Order, partial Shipments are done in a similar way.
The following diagram shows the original Sales Order together with the newly created Shipment document :-
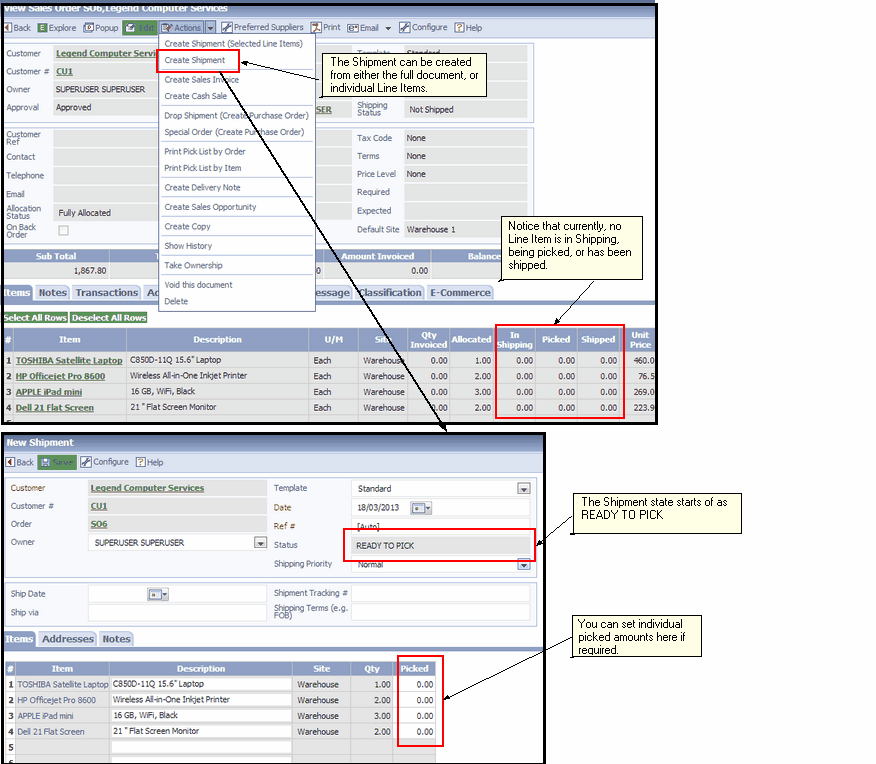 Creating a Shipment from a Sales Order
Notice that all the Line Items from the Sales Order are copied onto the Shipment. If we had selected only certain Line Items only these would have been copied.
The Line Items in the Shipment have a column Picked which holds the current number of Items picked relative to the the quantity (Qty) column. Note that setting the picked value here will propagate back to the associated Line Item in the Sales Order.
NOTE: In the Sales Order document you will notice a column In Shipping in the Line Item table. This number indicates the quantity of that line currently assigned to a Shipping document. Similarly, the Picked column is the quantity picked, and the Shipped column is the quantity shipped.
The Pick Pack-Ship process in its most general form needs to account for not only the Pick,Pack Ship states but also when Shipments are being Picked, being Packed and being Shipped. This ensures that, for larger warehouse operations, there is no risk of confusion and duplication of activity. For smaller operations these intermediate states may be to pedantic or cumbersome. In this cases certain stages may be omitted if required.
Shipment documents therefore go through the following states :-
These state transitions can be set on the Shipment document itself, or indeed controlled in bulk from the Shipments List, which is useful when dealing with multiple orders (see Pick-Pack-Ship Process for more details).
Here we are dealing with an individual document so let's show how we can change the status. The following diagram shows the above Shipping document after being saved.
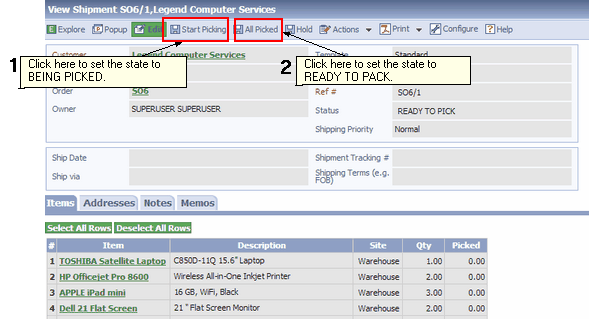 Picking
Referring to the numbered boxes in the diagram,
1. Clicking this button (Start Picking) will set the document state to BEING PICKED. This means that from the Shipment Lists no-one else can start picking the same Shipment by mistake.
2. Rather than editing and setting the pick amount on each line you can quickly pick all lines by clicking this button (All Picked). The document state will then be set to READY TO PACK.
So, if we click All Picked we get the following result :-
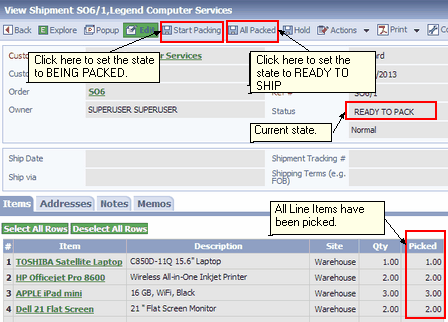 Packing
The Shipment is now in state READY TO PACK, and in a similar way to the above we can simply click All Packed to set the state to READY TO SHIP. Note also that each Line Item has been picked in full.
For completeness, the following two diagrams show how the document is taken to the SHIPPED state.
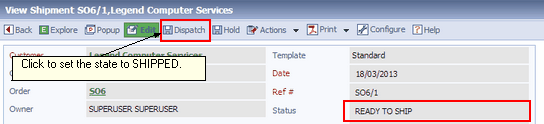 Shipping
Finally, clicking on Dispatch will set the state to SHIPPED.
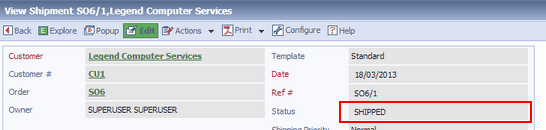 Shipped
OK so now the Shipment has gone through all the associated states from READY TO PICK to SHIPPED. As can been seen from the diagram below the associated Sales Order has the columns set appropriately, and also the Shipping status is set to Shipped.
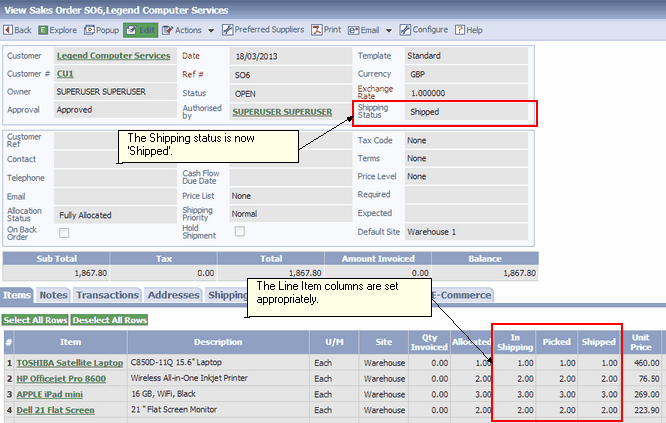 Sales Order status after Shipment
Related tasks and information Allocating Stock to Sales Orders
| ||||||||||||||