|
Topic: Miscellaneous > Working with Transactional Documents Sales Transactional Documents such as Sales Invoices have associated Billing and Shipping addresses. These are entered on the Document's Addresses tab.
The Billing address is typically where the Invoice is sent, and the Shipping address is where the Invoiced Items are sent.
This is similar on Purchase Documents, such as Purchase Order, apart from rather than a Billing address we have a Payment address, which signifies who we send any associated payment to.
By default the Billing/Shipping address is that specified on the Main Contact tab of the associated Customer/Supplier. However, Customers and Suppliers can have multiple Billing, Shipping and Payment addresses, and you can specify which ones to use as the default.
Entering multiple Billing/Shipping addresses We will use a Customer and Sales Invoice Document as an example, but the same principle applies to Suppliers etc.
1. Find/create the Customer Document for which you want to create multiple addresses.
2. From the Customer Action Bar click 'New Billing Address' from the Actions drop-down. This will display the new Billing Address Document.
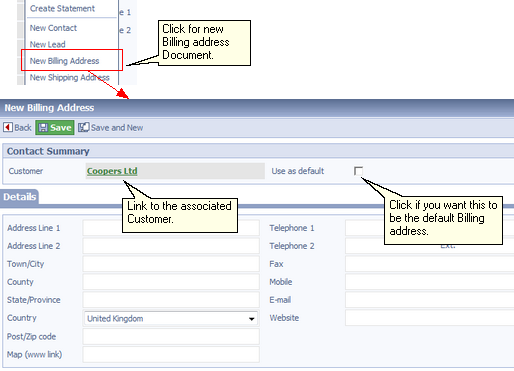 Create a new Billing Address
Shipping addresses are created in a similar way. You can have as many Billing/Shipping addresses as you like.
Selecting the Billing/Shipping Address on a Document As mentioned above the default Billing and Shipping addresses are that of the associated Customer/Supplier Main Contact. If however an alternative default has been setup, this will appear as the address. The Address tab has a drop-down from which you can select any of the associated Billing/Shipping addresses.
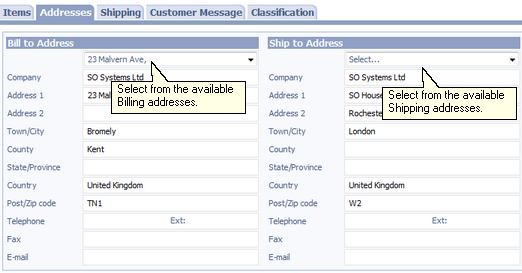 Entering a Document's Billing/Shipping addresses
|